
-26.png)

Essential Photoshop Techniques to Master for Stunning Editorial Photo Editing
- Jan 3
- 5 min read
Updated: Apr 28
Mastering the right tools can elevate your projects to a professional level.
Note: Some of the links in this post are affiliate links. This means if you click on the link and purchase the item, HiDesine may receive a small commission at no extra cost to you. We only recommend tools we genuinely use and love.
What are the essential Photoshop techniques for professional editorial photo editing and how can they elevate your brand’s visual storytelling?
You can master professional editorial photo editing by using essential Photoshop techniques such as advanced layer masking, frequency separation for skin retouching, and expert colour grading to create high-impact, polished visuals that define your brand’s authority. At HiDesine, we know that for Canadian entrepreneurs and designers aiming to "make their mark," the difference between a standard image and a stunning editorial piece lies in these expert-level details. By applying these refined post-processing methods to your marketing materials—whether for your social media feed or our premium flyer templates—you ensure your brand consistently projects a professional and sophisticated image in the Canadian market. In this guide, we dive into the technical workflows used by industry veterans to help you transform raw photography into exceptional brand assets that resonate with your audience.
Photoshop remains one of the most powerful tools in the world of photography and design. Whether you’re a professional designer, a small business owner refining your visuals, or a corporate director seeking polished marketing materials, mastering the right tools can elevate your projects to a professional level. Today, we dive into the most effective editorial photo editing Photoshop tools and techniques to help you edit, restore, and enhance your images with precision.

What Are the Best Tools for Editorial Photo Editing in Photoshop?
Editing photographs is all about refinement, and Photoshop offers an arsenal of tools to perfect your work. Here are the key tools every designer should know:
Healing Brush Tool
This tool is perfect for seamless retouching. By sampling surrounding pixels, the Healing Brush eliminates blemishes and distractions from your image. Whether it’s a stray hair or a distracting background detail, this tool handles imperfections effortlessly.
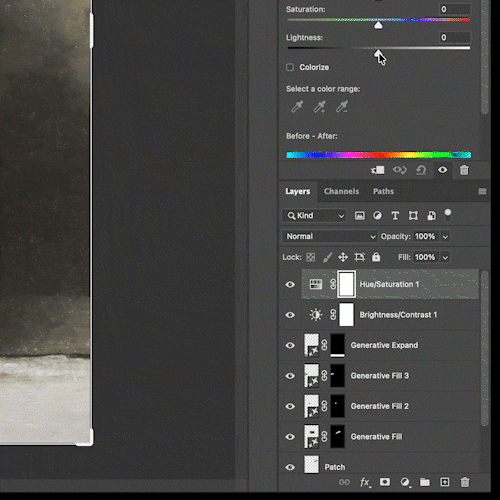
Adjustment Layers
Want to fine-tune colors or adjust contrast? Adjustment Layers allow you to make non-destructive edits, meaning your original image remains intact. They are essential for creating professional-grade edits without worrying about permanent changes.
Curves Tool
For precise control over brightness and contrast, the Curves Tool is your go-to option. It allows you to enhance tonal ranges, bring out subtle details, or add dramatic lighting effects to your image.
Dodge & Burn Tools
These tools add depth to your photos. Use Dodge to lighten areas and highlight details, while Burn darkens shadows to create contrast and dimension. Together, they mimic traditional darkroom techniques for digital images.

Restore Your Photos Instantly with These Tools
Restoring old or damaged photos is no longer a daunting task with Photoshop. Here’s how to revive memories quickly and effectively:
Spot Healing Brush Tool
When you need instant fixes, this tool automatically blends imperfections with the surrounding area. From small scratches to distracting spots, it’s your first step toward restoration.
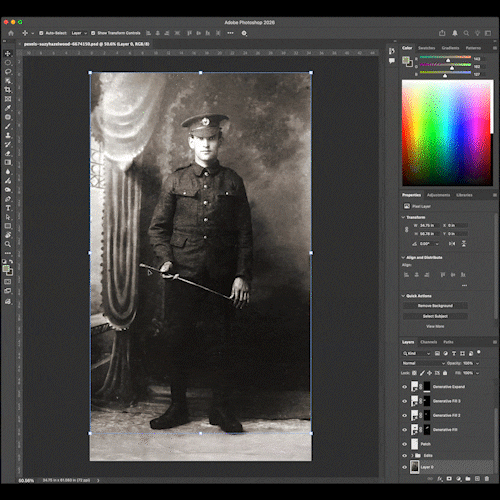
Patch Tool
For larger repairs, the Patch Tool provides more control. You can manually select areas to replace or blend, ensuring seamless integration.
Content-Aware Fill
This intelligent tool fills in missing areas by analyzing the surrounding content. It’s ideal for fixing tears or removing objects from your photos.
Dust & Scratches Filter
This often-overlooked filter reduces noise in old photographs. With a few tweaks, you can restore clarity while maintaining the photo’s original texture.

How Should You Use Color to Make a Statement in Your Images?
Color isn’t just a design element; it’s a statement. By mastering Photoshop’s color tools, you can convey emotion and create impactful visuals:
Vibrance and Hue/Saturation
These tools let you enhance or mute colors to create a cohesive mood. While Vibrance protects skin tones, Hue/Saturation adjusts the intensity of specific colors, giving you control over the entire palette.
Selective Color
Precision is key here. This tool enables you to adjust individual color channels, perfect for refining brand colors or highlighting specific elements in your design.
Gradient Map
Transform the tone of your images with a Gradient Map. By mapping gradients to different tonal values, you can add dramatic effects or unique artistic touches to your work.
Color Balance
This tool shifts the mood of your image by adjusting shadows, midtones, and highlights. Use it to create warmth, coolness, or even surreal effects.

What’s the Best Way to Get Rid of Your Image Background?
Removing backgrounds is a common task in design. Photoshop offers multiple tools to suit different needs:
Quick Selection Tool & Layer Masks
This combination is perfect for fast and accurate background removal. The Quick Selection Tool identifies edges automatically, while Layer Masks allow you to refine and adjust the selection without losing flexibility.
Pen Tool
For ultimate precision, the Pen Tool is unmatched. It lets you create detailed paths around objects, ensuring clean and professional cutouts.
Magic Wand Tool
Simple yet effective, the Magic Wand Tool selects areas of similar color. It’s ideal for removing backgrounds with high contrast or solid colors.
Select Subject
Photoshop’s AI-driven tool automatically detects the main subject in an image, streamlining the background removal process for more straightforward edits.
How to Write Prompts for Photoshop AI and Get Amazing Results
Photoshop’s AI tools can save you time and enhance creativity. To unlock their full potential, you need to write clear, specific prompts:
Be Descriptive - For example, instead of saying “brighten the photo,” try “increase the brightness of the face while keeping the background unchanged.”
Experiment with Inputs - Photoshop AI responds to different word combinations. Don’t hesitate to tweak prompts to find what works best for your project.
Focus on Details - AI works best when given specific instructions, such as “add a soft vignette to the corners and adjust saturation for a vibrant look.”
Secret Photoshop Editing Hacks That No One Tells You About
Ready to take your skills to the next level? Here are some hidden gems that can make a big difference in your workflow:
Blend If Feature - Use this tool to blend layers seamlessly based on brightness levels. It’s a subtle yet powerful way to create natural transitions.
High Pass Filter - Achieve sharp details by applying the High Pass filter and setting the blend mode to Overlay. This technique enhances texture without over-sharpening.
Liquify Tool for Subtle Adjustments - Beyond dramatic effects, the Liquify Tool can refine small details like smoothing clothing or adjusting facial expressions.
Actions for Automation - Speed up repetitive tasks by creating Actions. From resizing to color adjustments, this feature improves efficiency across projects.

What's Next?
Now that you’ve mastered these essential tools and techniques, you’re ready to explore how Photoshop can elevate your image editing further. In our next post, we’ll dive deep into “Advanced Photoshop Editing: Mastering Image Retouching and Composition” to help you push your skills to the next level.
To display the Widget on your site, open Blogs Products Upsell Settings Panel, then open the Dashboard & add Products to your Blog Posts. Within the Editor you will only see a preview of the Widget, the associated Products for this Post will display on your Live Site.
Start your 14 days Free Trial to activate products for more than one post.
icon above or open Settings panel.
Please click on the


Comments