
-26.png)

Master Adobe Illustrator for Beginners: Illustrator vs Photoshop vs InDesign Explained
Illustrator becomes easier when you stop trying to learn every feature at once.
Note: Some of the links in this post are affiliate links. This means if you click on the link and purchase the item, HiDesine may receive a small commission at no extra cost to you. We only recommend tools we genuinely use and love.
If you’ve ever opened Adobe Illustrator and felt lost in the panels, tools, and tiny anchor points, you’re not alone. Illustrator is powerful, but it can feel overwhelming at first because it doesn’t work like most beginner-friendly design apps. The good news is once you understand what Illustrator is actually for, the learning curve gets a lot less intimidating.
Illustrator is built for clean, scalable artwork. Logos. Icons. Badges. Packaging elements. Illustrations. Pattern graphics. Anything that needs crisp edges and flexible sizing belongs here. That means when you to blow it up on a billboard, it won't get all pixelated.
This guide breaks down Illustrator, Photoshop, and InDesign in simple language, then walks through the main Illustrator tools worth learning first as a way to simplify the learning process.

Illustrator, Photoshop, and InDesign Each have a Different Job
Adobe apps overlap a bit, which is why beginners often get confused. They're powerful tools that can sync with each other beautifully. You can make a flyer in Illustrator. You can add text in Photoshop. You can place graphics in InDesign, that doesn't mean that's the best use for it. Each app has a main strength and purpose. Choosing the right one saves time, frustration and headaches.
PROGRAM | BEST FOR | FORMAT | COMMON PROJECTS |
Adobe Illustrator
| Scalable graphics with clean lines | Vector files | Logos, icons, illustrations, badges, patterns |
Adobe Photoshop
| Pixel-based image editing | Raster files | Photo edits, digital painting, mockups, texture work |
Adobe InDesign
| Multi-page layouts and publishing | Multi-page print design | Brochures, magazines, books, flyers, catalogues, PDFs |
Adobe Illustrator's Best Strength is for Vector Graphics
Illustrator uses vector graphics, which are built with paths, points, curves, shapes, and various effects.
That means you can take a tiny icon and scale it up for a storefront sign without it turning blurry. The edges stay sharp because Illustrator recalculates the shape instead of stretching pixels.
Use Illustrator when you need:
A logo that works on a business card and a banner
Custom icons for a website or app
Simple product illustrations
Pattern artwork for packaging
Clean typography-based graphics
Scalable artwork for print or digital use
If you’re learning illustrator for beginners, this is the biggest idea to understand first. You’re not painting with pixels, you’re building with paths.
Adobe Photoshop is Meant for Editing Pixels and Images
Photoshop works best when you’re editing photos or pixel-based artwork. You can use it for other use-cases, like designing flyers, but that's not necessarily it's best strength. It’s the tool when you need photo retouching, colour correction, digital painting, photo composites, web graphics, and textured designs.
Photoshop is amazing, but raster images have one big limit. When you scale them too far, they can lose quality. A small low-resolution photo won’t magically become crisp just because you make it bigger.
Use Photoshop when you need:
Photo editing
Background removal
Digital painting
Image mockups
Social graphics with photo content
Lighting, colour, and texture control

Check it Out!
A handy product for Photoshop and Illustrator work is a drawing tablet. If you prefer drawing by hand, browse options like the Wacom Intuos drawing tablet on Amazon.ca. A tablet isn’t required, but it can make curves, sketches, and illustration work feel more natural.
Adobe InDesign is Built for Multi-Page Layouts and Print Design
InDesign handles structure. It’s built for multi-page documents, especially when text and images need to work together across pages.
Use InDesign when you need:
Brochures
Magazines
Lookbooks
Ebooks
Product catalogues
Reports
Interactive PDFs
Here’s a simple way to think about it.
Create your logo in Illustrator. Edit your photos in Photoshop. Build the final brochure in InDesign.
That setup keeps each app doing what it does best.
Why Learning Adobe Illustrator Pays Off for Beginners
Illustrator is one of those tools that keeps paying you back. At first, you’re learning where everything is. Then one day, you realize you can build a clean icon set, update a logo colour, export every file size you need, and keep total control over the artwork.
That’s a big deal.
Think of this as a beginners guide to Adobe Illustrator, with the vector tools, features, and benefits that support better design success.
For small business work, Illustrator helps you create assets that don’t fall apart when they’re resized. That matters for signs, stickers, packaging, labels, shirts, websites, menus, and product graphics.
For designers, Illustrator gives you control. You can adjust individual anchor points, combine shapes, align objects perfectly, and export files for print or web without rebuilding everything from scratch.
If you’re building a visual identity, don’t stop at a logo. Custom icons are another strong next step. Read this next when it’s time to expand your system: How to Create Stunning Designs That Work.
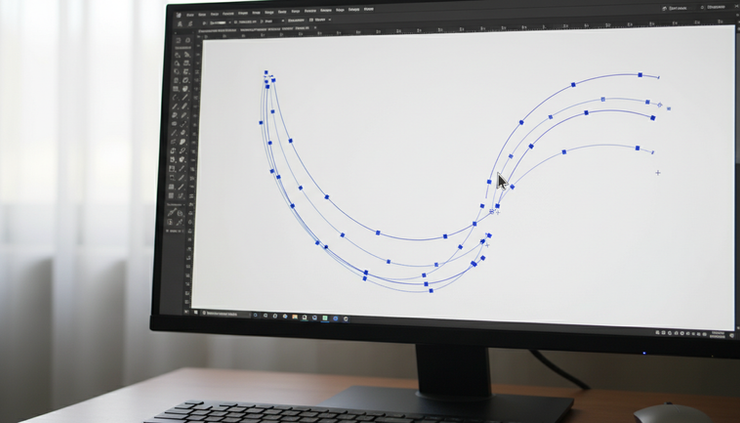
The Illustrator features beginners should learn first
Illustrator has a lot of tools, but you don’t need to master everything at once. Start with the tools that show up in almost every project.
Vector graphics keep your work crisp
This is Illustrator’s main advantage. Vector artwork is made from mathematical shapes, not fixed pixels. That’s why a logo can scale from 2 cm wide to 2 metres wide without losing sharpness.
This matters for:
Logo files
Signage
Stickers
Packaging
Embroidery artwork
Engraving files
App icons
Website icons
Tip: when you build a logo or icon, avoid relying on raster effects too early. Keep the base artwork vector as long as possible.
Artboards help you build multiple versions in one file
Artboards are like separate canvases inside one Illustrator document.
You might use one artboard for a logo, one for a horizontal version, one for a stacked version, and one for a small icon version. You can also use artboards for social graphics, packaging panels, sticker sheets, or export sizes.
A simple starter setup could be:
Artboard 1 for the main logo
Artboard 2 for the standalone logo mark
Artboard 3 for the stacked version
Artboard 4 for the horizontal version (if needed)
Artboards 5-8 for the black-and-white versions
This keeps related work in one place. It also makes exporting your files easier.
The Pen Tool Gives You Real Control
The Pen Tool is the tool most beginners avoid. It’s also one of the most useful tools in Illustrator. It creates straight lines, curves, shapes, and custom paths. It’s how you draw precise artwork instead of relying only on basic shapes.
A few beginner rules make it easier:
Click once to create a corner point.
Click and drag to create a curve.
Use fewer points for smoother artwork.
Place points where the curve changes direction.
Adjust handles instead of adding too many anchors.
Don’t try to draw a whole complex illustration on day one. Practice simple shapes first. Trace a leaf, a mug, a letterform, or a basic icon.
If you like physical practice alongside screen work, something like a Thick A5/A4 Notebook can help you plan icons before drawing them in Illustrator.
The Pathfinder Tool Builds Shapes in a Click
The Pathfinder panel lets you combine, subtract, divide, and overlap shapes. It’s one of the fastest ways to build clean vector icons.
For example, you can create a simple crescent moon by overlapping two circles and subtracting the front shape. You can build badges by combining circles, rectangles, stars, and lines.
The Pathfinder actions include:
Unite
Minus Front
Intersect
Exclude
Divide
If you’re making icons, badges, logos, or simple illustrations, Pathfinder will become one of your favourite tools.
Symbols Save Time on Repeated Elements
Symbols are reusable artwork items. If you use the same icon, leaf, star, arrow, or pattern element many times, turn it into a symbol.
When you edit the main symbol, Illustrator updates the copies. That helps when you’re building repeating designs, maps, diagrams, or decorative systems.
Use symbols when:
An element repeats often
You need design consistency
You want easy updates later
You’re building pattern-style artwork
Symbols aren’t always the first thing beginners learn, but they’re worth knowing once you start making larger files.
The Tools Beginners should Practice Every Week
You don’t need a giant practice plan. Pick a few core tools and use them often. That builds muscle memory fast.
Selection Tool and Direct Selection Tool do different things
These two tools look similar, but they behave very differently.
The Selection Tool is the black arrow. It selects whole objects. Use it to move, resize, rotate, group, and arrange full shapes.
The Direct Selection Tool is the white arrow. It selects parts of objects, like anchor points, handles, and path segments. Use it to edit the shape itself.
A quick example:
Want to move an entire circle? Use the Selection Tool.
Want to pull one point of a shape into a new form? Use the Direct Selection Tool.
This difference matters. A lot of beginner frustration comes from using the wrong arrow.
Layers keep complex files under control
Layers help you organize artwork. They also stop accidental edits.
Use layers for:
Sketches
Background shapes
Text
Icons
Guides
Final artwork
Name your layers clearly. Don’t leave everything as `Layer 1`, `Layer 2`, and `Layer 3` forever. Clear layer names make edits faster, especially when you reopen a file weeks later.
A good beginner habit is to lock anything you’re not currently editing. That one step prevents a lot of mistakes.

Keyboard shortcuts speed up everything
Shortcuts feel small at first, but they save a lot of time.
Start with these:
SHORTCUT | ACTION |
|---|---|
`V` | Selection Tool |
`A` | Direct Selection Tool |
`P` | Pen Tool |
`T` | Type Tool |
`M` | Rectangle Tool |
`L` | Ellipse Tool |
`Ctrl + G` or `Cmd + G` | Group objects |
`Ctrl + Z` or `Cmd + Z` | Undo |
`Ctrl + C` or `Cmd + C` | Copy |
`Ctrl + V` or `Cmd + V` | Paste |
Don’t try to memorize every shortcut at once. Learn the ones you use daily. The rest will come naturally.
If your keyboard shortcuts feel awkward on a laptop, a separate keyboard can help. Browse options like a compact Bluetooth keyboard on Amazon if you want a cleaner setup for longer design sessions.
Common Illustrator Learning Hurdles and How to Get Past Them
Every beginner hits a few walls. That doesn’t mean you’re bad at design. It means Illustrator expects a different way of thinking.
The Pen Tool feels impossible
This is normal. The Pen Tool has its own logic.
To improve, practice curves only. Don’t start with a detailed mascot or logo. Open a blank file and draw waves, circles, leaves, ribbons, and simple outlines.
Use fewer points than you think you need. Smooth curves usually come from fewer anchor points, not more.
Your shapes don’t line up
Use Illustrator’s alignment tools. Don’t eyeball everything. Turn on Smart Guides under `View > Smart Guides`. Use the Align panel to center, distribute, and line up objects cleanly. This matters for logos and icons because tiny alignment problems become obvious at small sizes.
Your file gets messy fast
Messy files happen when everything lives on one layer, nothing is named, and random shapes stack on top of each other.
Fix it with three habits:
Name important layers.
Group related objects.
Delete unused sketches and hidden shapes.
A clean file is easier to revise, export, and hand off.
Export settings feel confusing
Illustrator can export many file types, and each has a purpose.
File types include:
`AI` for your editable working file
`PDF` for print sharing
`SVG` for web icons and scalable graphics
`PNG` for transparent raster exports
`JPG` for flat image previews
Keep your editable Illustrator file. Don’t rely only on exported PNGs or JPGs.
You compare your work too early
This one slows people down. You’ll see polished work online and wonder why your lines feel clunky.
Build small projects instead. Make a 10-icon set. Redraw a simple object in three styles. Create one badge with text on a circle. These smaller wins teach the exact skills you need.
For more practice resources, grab a few freebies from the Hidesine free design resources library. Use them to study structure, spacing, and export setup.
A Simple Illustrator Practice Plan for the First Month
Here’s a realistic plan that won’t take over your life.
WEEK 1
Learn the workspace. Move panels around. Create basic shapes. Practice fill, stroke, scale, rotate, and align.
WEEK 2
Practice the Pen Tool. Draw simple objects with as few points as possible. Focus on smooth curves.
WEEK 3
Build icons with Pathfinder. Start with basic symbols like arrows, hearts, stars, location pins, tags, and checkmarks.
WEEK 4
Create a small real project. Make a mini logo suite, sticker set, or five matching icons. Export the files as AI, PDF, SVG, and PNG.
By the end of the month, Illustrator should feel less like a mystery and more like a tool you can control.

FAQ
Is Illustrator better than Photoshop?
Illustrator is better for vector artwork like logos, icons, and scalable illustrations. Photoshop is better for photo editing, digital painting, and pixel-based designs. The better choice depends on the project.
Is Illustrator hard for beginners?
It can feel hard at first because it uses paths and anchor points instead of pixels. Once you learn the Pen Tool, Selection Tool, Direct Selection Tool, layers, and Pathfinder, it starts to feel much easier.
Can I use Illustrator to design a logo?
Yes. Illustrator is one of the best tools for logo design because it creates scalable vector files. That means the logo can stay sharp across print, signage, packaging, and web use.
Do I need InDesign if I already use Illustrator?
If you’re making multi-page documents, yes, InDesign is usually the better choice. Illustrator is great for creating assets. InDesign is better for arranging long text, images, and pages.
What should I learn first in Illustrator?
Start with shapes, artboards, layers, the Selection Tool, the Direct Selection Tool, the Pen Tool, Pathfinder, and basic export settings. These skills cover most beginner projects.
Your Next Step with Illustrator
Illustrator becomes easier when you stop trying to learn every feature at once. Start with vector basics. Practice the Pen Tool. Use layers. Build shapes with Pathfinder. Export small projects in a few useful formats.
That foundation is enough to create clean logos, icons, and illustrations that scale properly.
When you’re ready to practice with templates and design assets, check out the free design resources from Hidesine. Then keep going with the next topic, custom iconography and why it matters for your visual system.
To display the Widget on your site, open Blogs Products Upsell Settings Panel, then open the Dashboard & add Products to your Blog Posts. Within the Editor you will only see a preview of the Widget, the associated Products for this Post will display on your Live Site.
Start your 14 days Free Trial to activate products for more than one post.
icon above or open Settings panel.
Please click on the


Comments